
Creating a shared folder in Windows 2000
To use the Scan to Folder function, it is necessary to create a shared folder on the destination computer. To create a shared folder in Windows, follow these steps:
Note
As an example, in this procedure we will explain how to create a shared folder with the user "user01" having write access.
- User name
user01
- Shared folder name
share
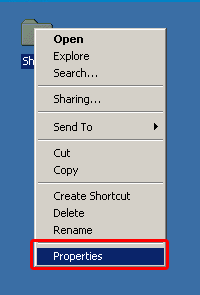
- Right-click on the folder you would like to share, and then select [Properties].
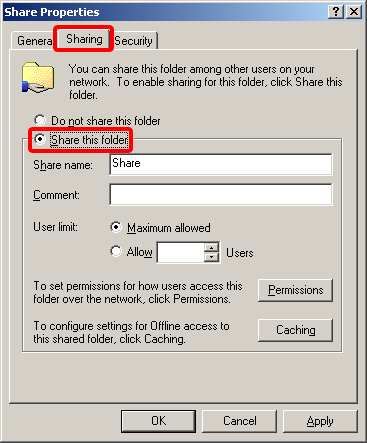
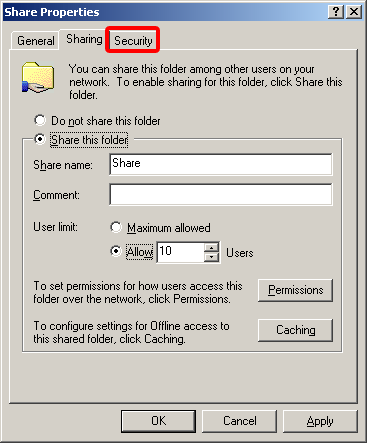
- Click the [Sharing] tab, and then click [Share this folder].
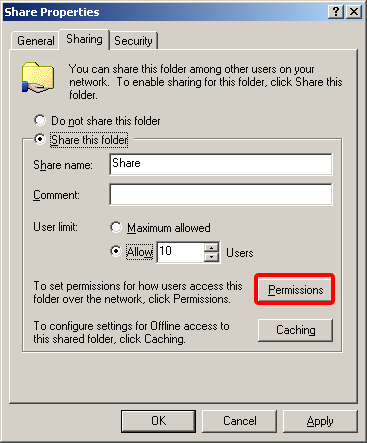
- Click [Permissions].
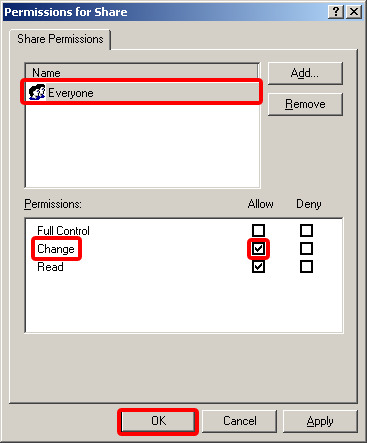
- Click [Everyone], and then click the [Allow] checkbox next to [Change] to turn it to ON. Click [OK].
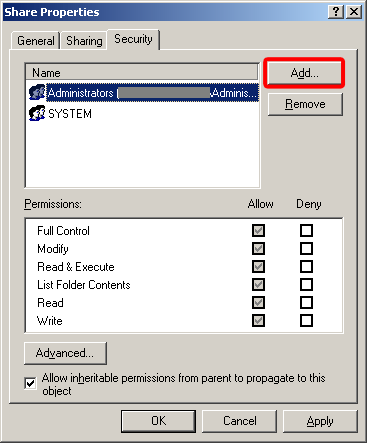
- Click the [Security] tab.
Note
- If there is no [Security] tab for the shared folder, the following steps are not necessary.
Click [OK] and then close the properties window.
- Click [Add].
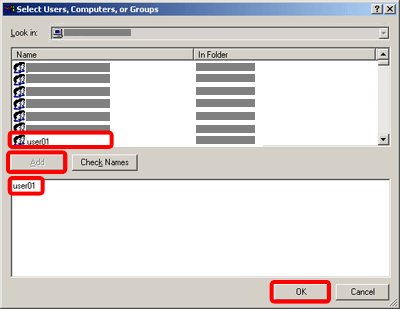
- Select the user name or group name, and then click [Add].
Confirm that the user or group has been added, and then click [OK].
We have only entered "user01" as the user name for reference purposes.
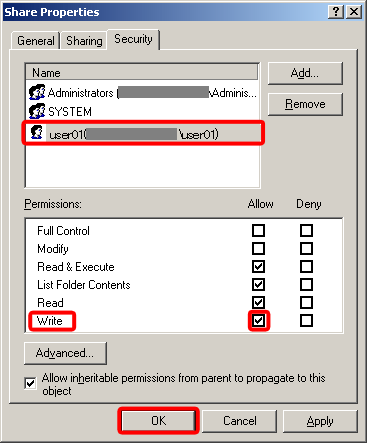
- Select the user or group you added in step 7, set the [Allow] checkbox next to [Write] to turn it to ON, and then click [OK].
We have given the user "user01" permission of "Write" access for reference purposes.
- Confirm that the shared folder has been created.

Note:
-
If authentication is required to access the folder, the login screen appears. Enter the user name and password.
-
If you change the protocol after entering the path name, user name, or password, a confirmation message appears.
-
Computer and shared folder names containing more than 12 characters cannot be displayed.
-
The device may fail to transfer the file if you do not have the write privileges for the shared folder or there is not enough free hard disk space.
-
You can register the path to the destination in address book of the device.